> ## Documentation Index
> Fetch the complete documentation index at: https://help.eeva.ai/llms.txt
> Use this file to discover all available pages before exploring further.
# Appliances
> Add your appliances so eeva can track manuals, warranties, recalls, and service history.
Appliances are the heart of eeva. Add one and eeva does the heavy lifting: it auto-fetches the manual, warranty info, and recall data from the model number, then keeps watching for recalls and warranty expirations. You access your appliances from the House tab.
 ## Open your appliances
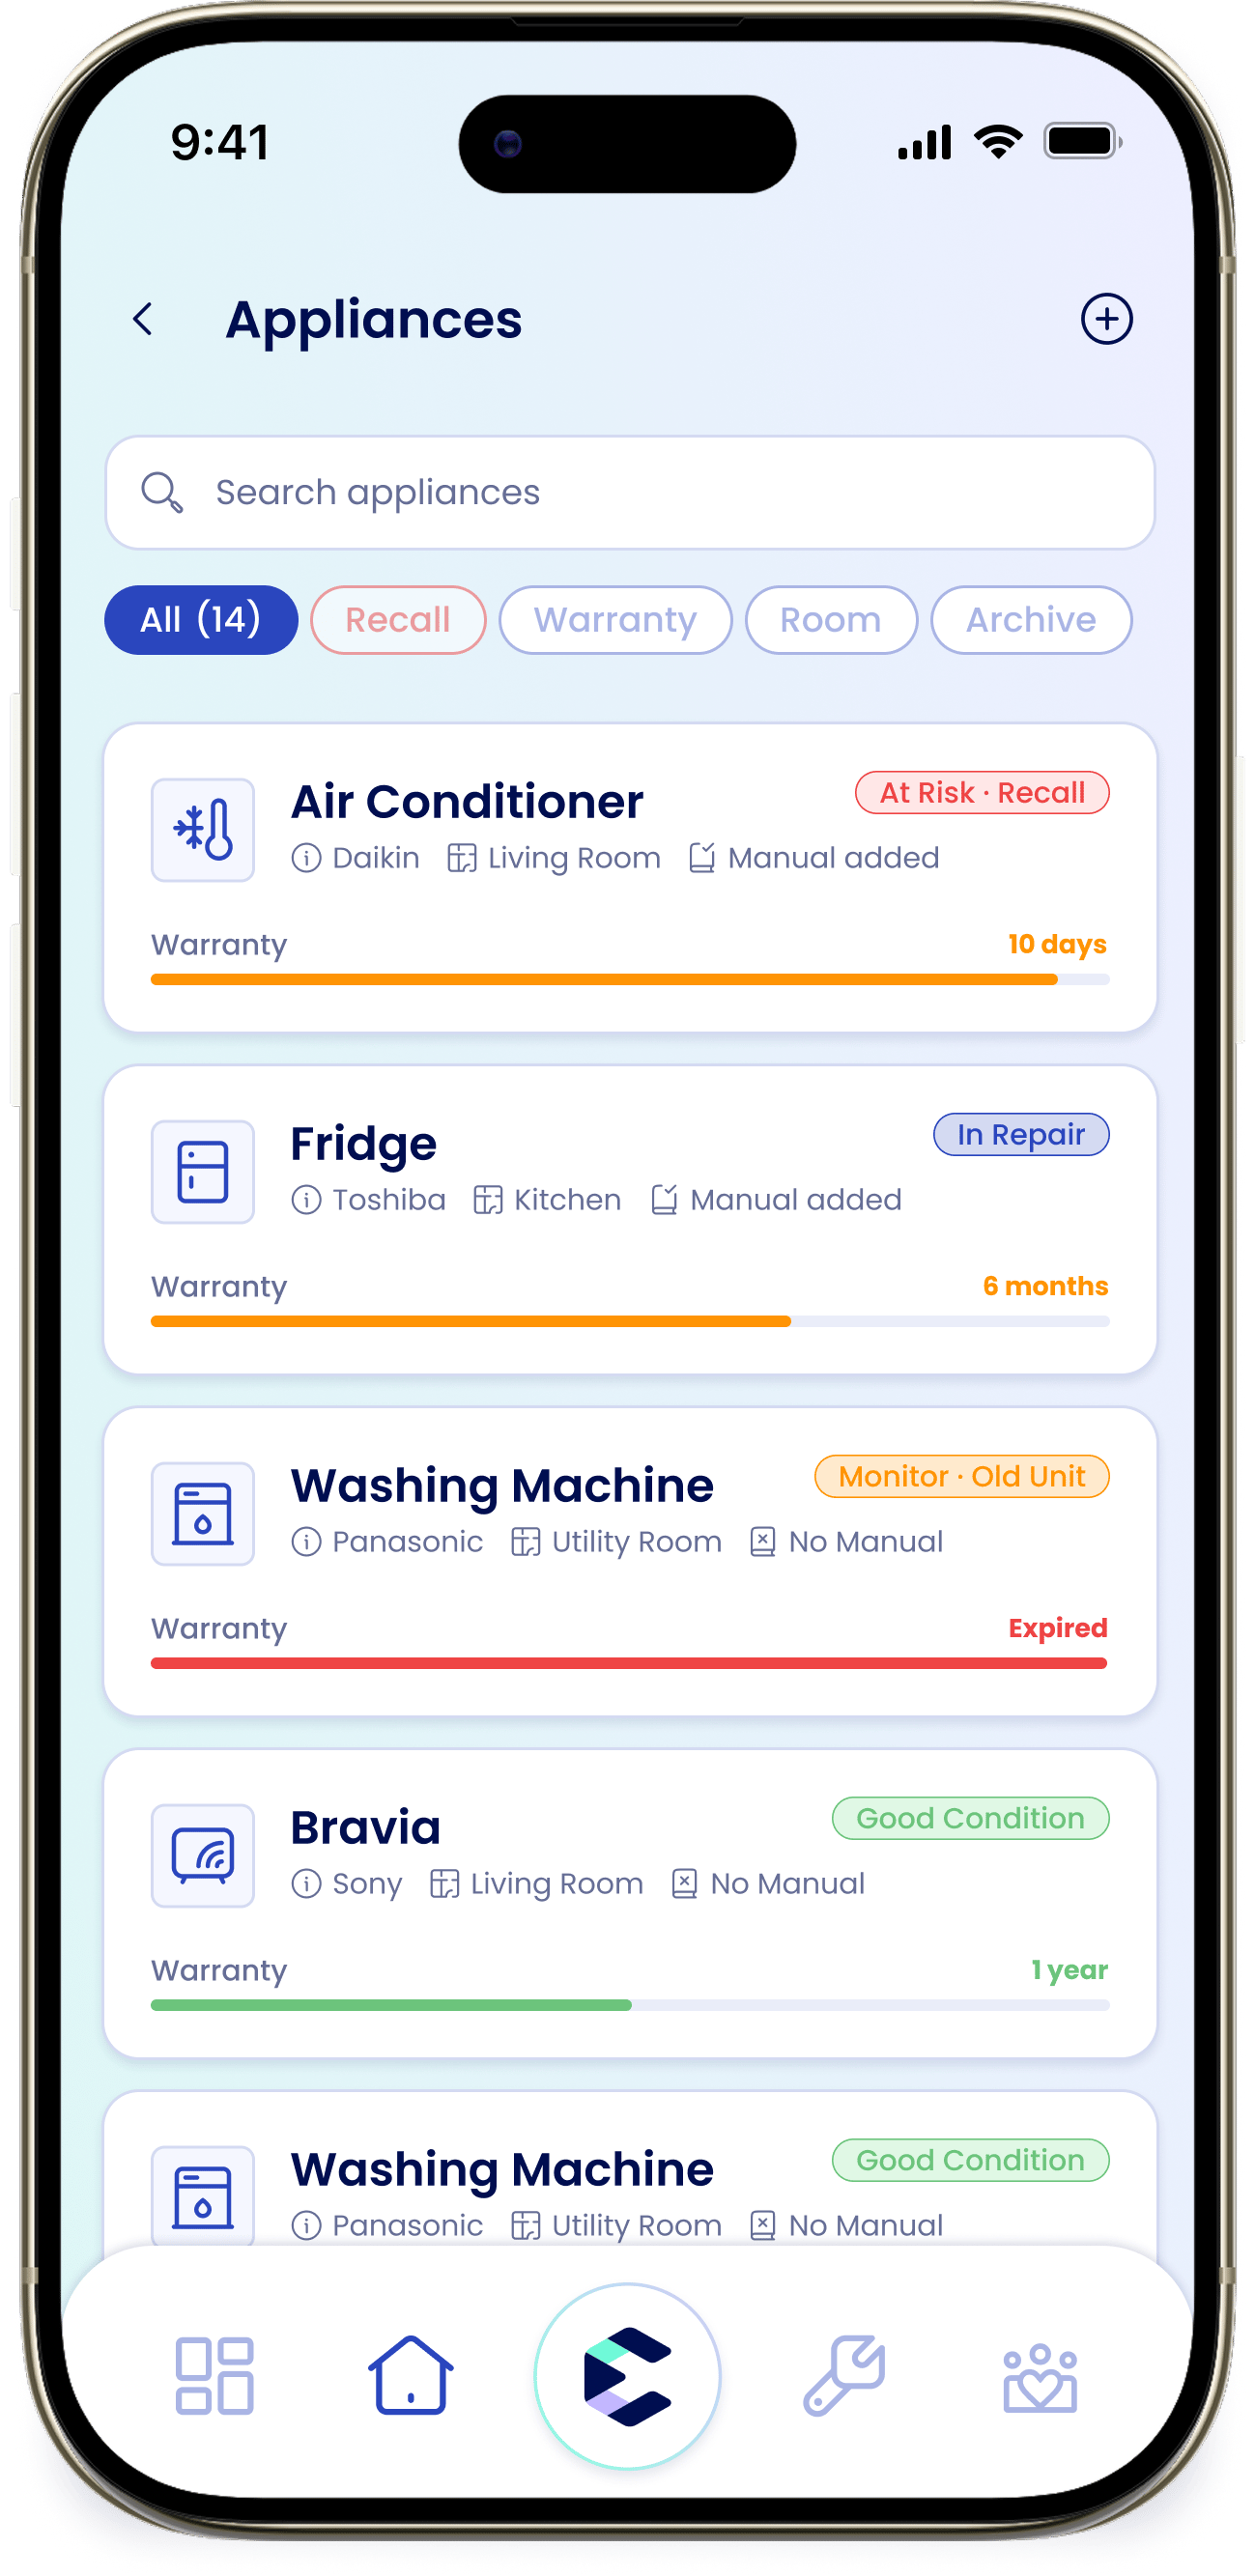
From the Home tab, tap the "Appliances" card. At the top there's search field, "Search appliances", and filter to choose from: "All (N)", "Recall", "Warranty", "Room", and "Archived". Tap the + to add one.
If you haven't added anything yet, you'll see "No appliances yet!" with "Scan label" and "Add manually".
## Add an appliance
The fastest way is to scan the model label so eeva can automatically fill in the details. You can also type the details in by hand.
Tap +, then choose "Scan the label (recommended)" and tap "Continue".
On the "Scan the appliance label" screen, tap "Tap to scan" and aim your camera at the label — usually a sticker on the back, top, or inside the appliance. Hold steady.
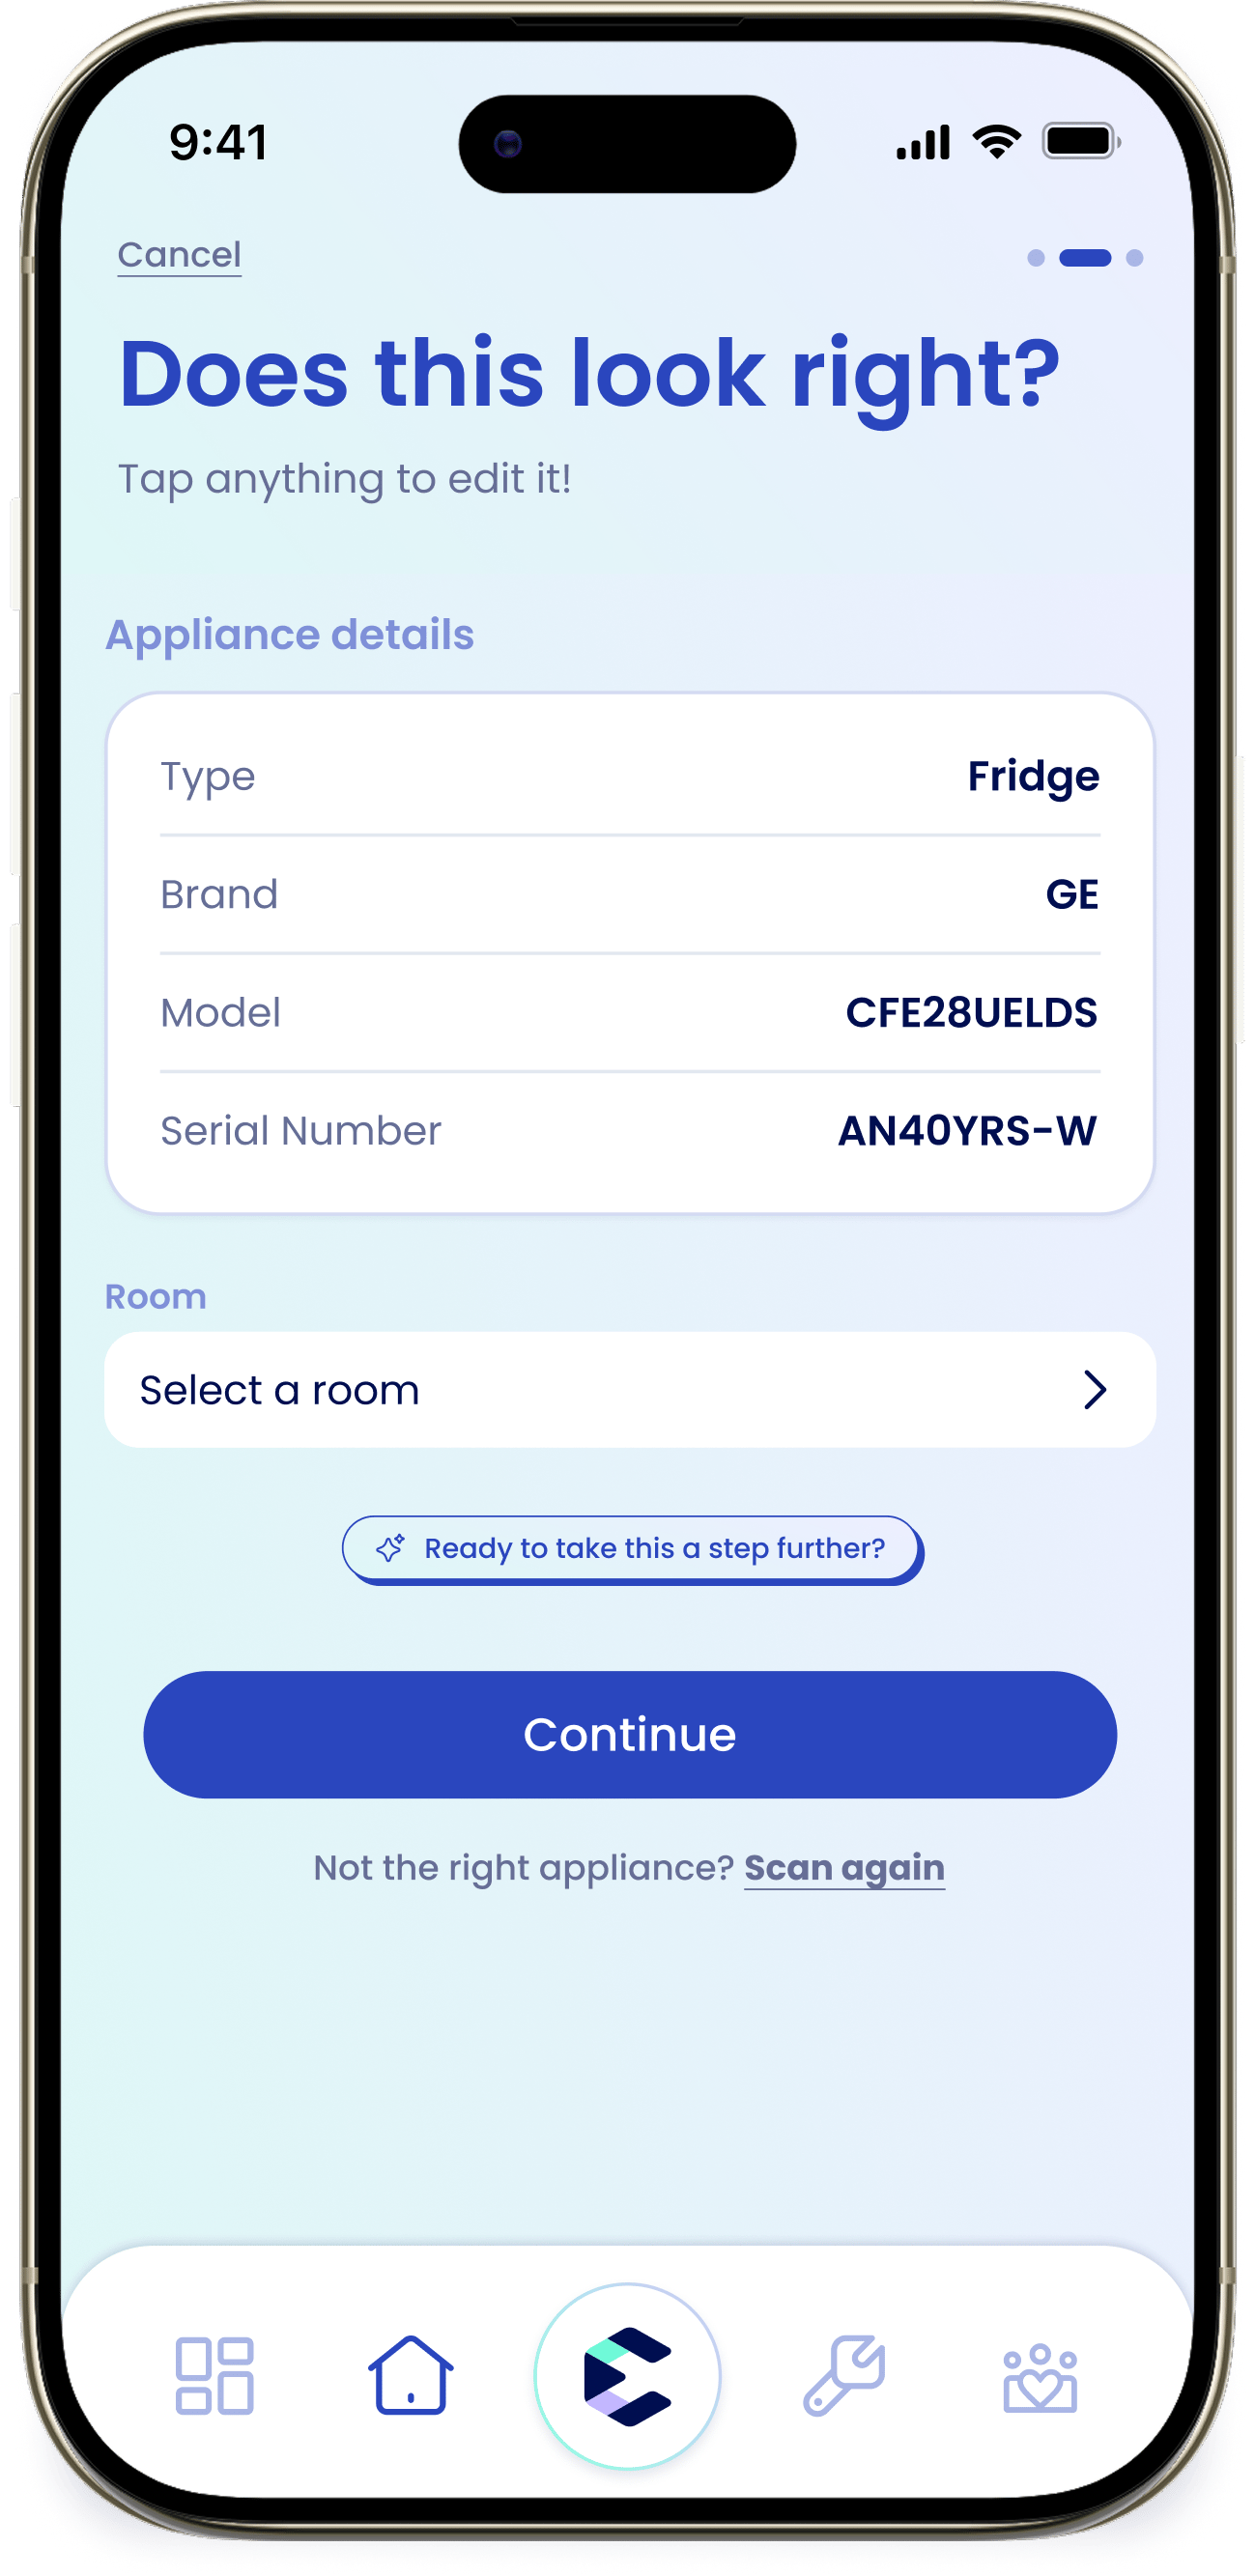
On a good read you'll see "Does this look right?" with editable "Appliance type", "Brand", "Model Number", and "Serial Number" fields. Pick a "Room" if you like. If it's wrong, tap "Not the right appliance? Scan again".
Tap "Add to eeva" to save the appliance to your home.
## Open your appliances
From the Home tab, tap the "Appliances" card. At the top there's search field, "Search appliances", and filter to choose from: "All (N)", "Recall", "Warranty", "Room", and "Archived". Tap the + to add one.
If you haven't added anything yet, you'll see "No appliances yet!" with "Scan label" and "Add manually".
## Add an appliance
The fastest way is to scan the model label so eeva can automatically fill in the details. You can also type the details in by hand.
Tap +, then choose "Scan the label (recommended)" and tap "Continue".
On the "Scan the appliance label" screen, tap "Tap to scan" and aim your camera at the label — usually a sticker on the back, top, or inside the appliance. Hold steady.
On a good read you'll see "Does this look right?" with editable "Appliance type", "Brand", "Model Number", and "Serial Number" fields. Pick a "Room" if you like. If it's wrong, tap "Not the right appliance? Scan again".
Tap "Add to eeva" to save the appliance to your home.
 Tap +, choose "Enter manually", then tap "Continue".
Choose an appliance type — "Refrigerator", "Oven", "Dishwasher", "Washing Machine", "Dryer", or "Other" — then enter the "Brand" and "Model Number". Set a "Room" if you want.
Tap "Continue" to save. eeva uses the model number to fetch the manual, warranty, and recall data for you.
## What eeva auto-fetches
From the model number, eeva pulls in the product manual, maintenance schedule, the warranty window, and starts safety recall monitoring so your appliance is ready to get tracked.
## The appliance screen
Open any appliance to see everything eeva keeps for it:
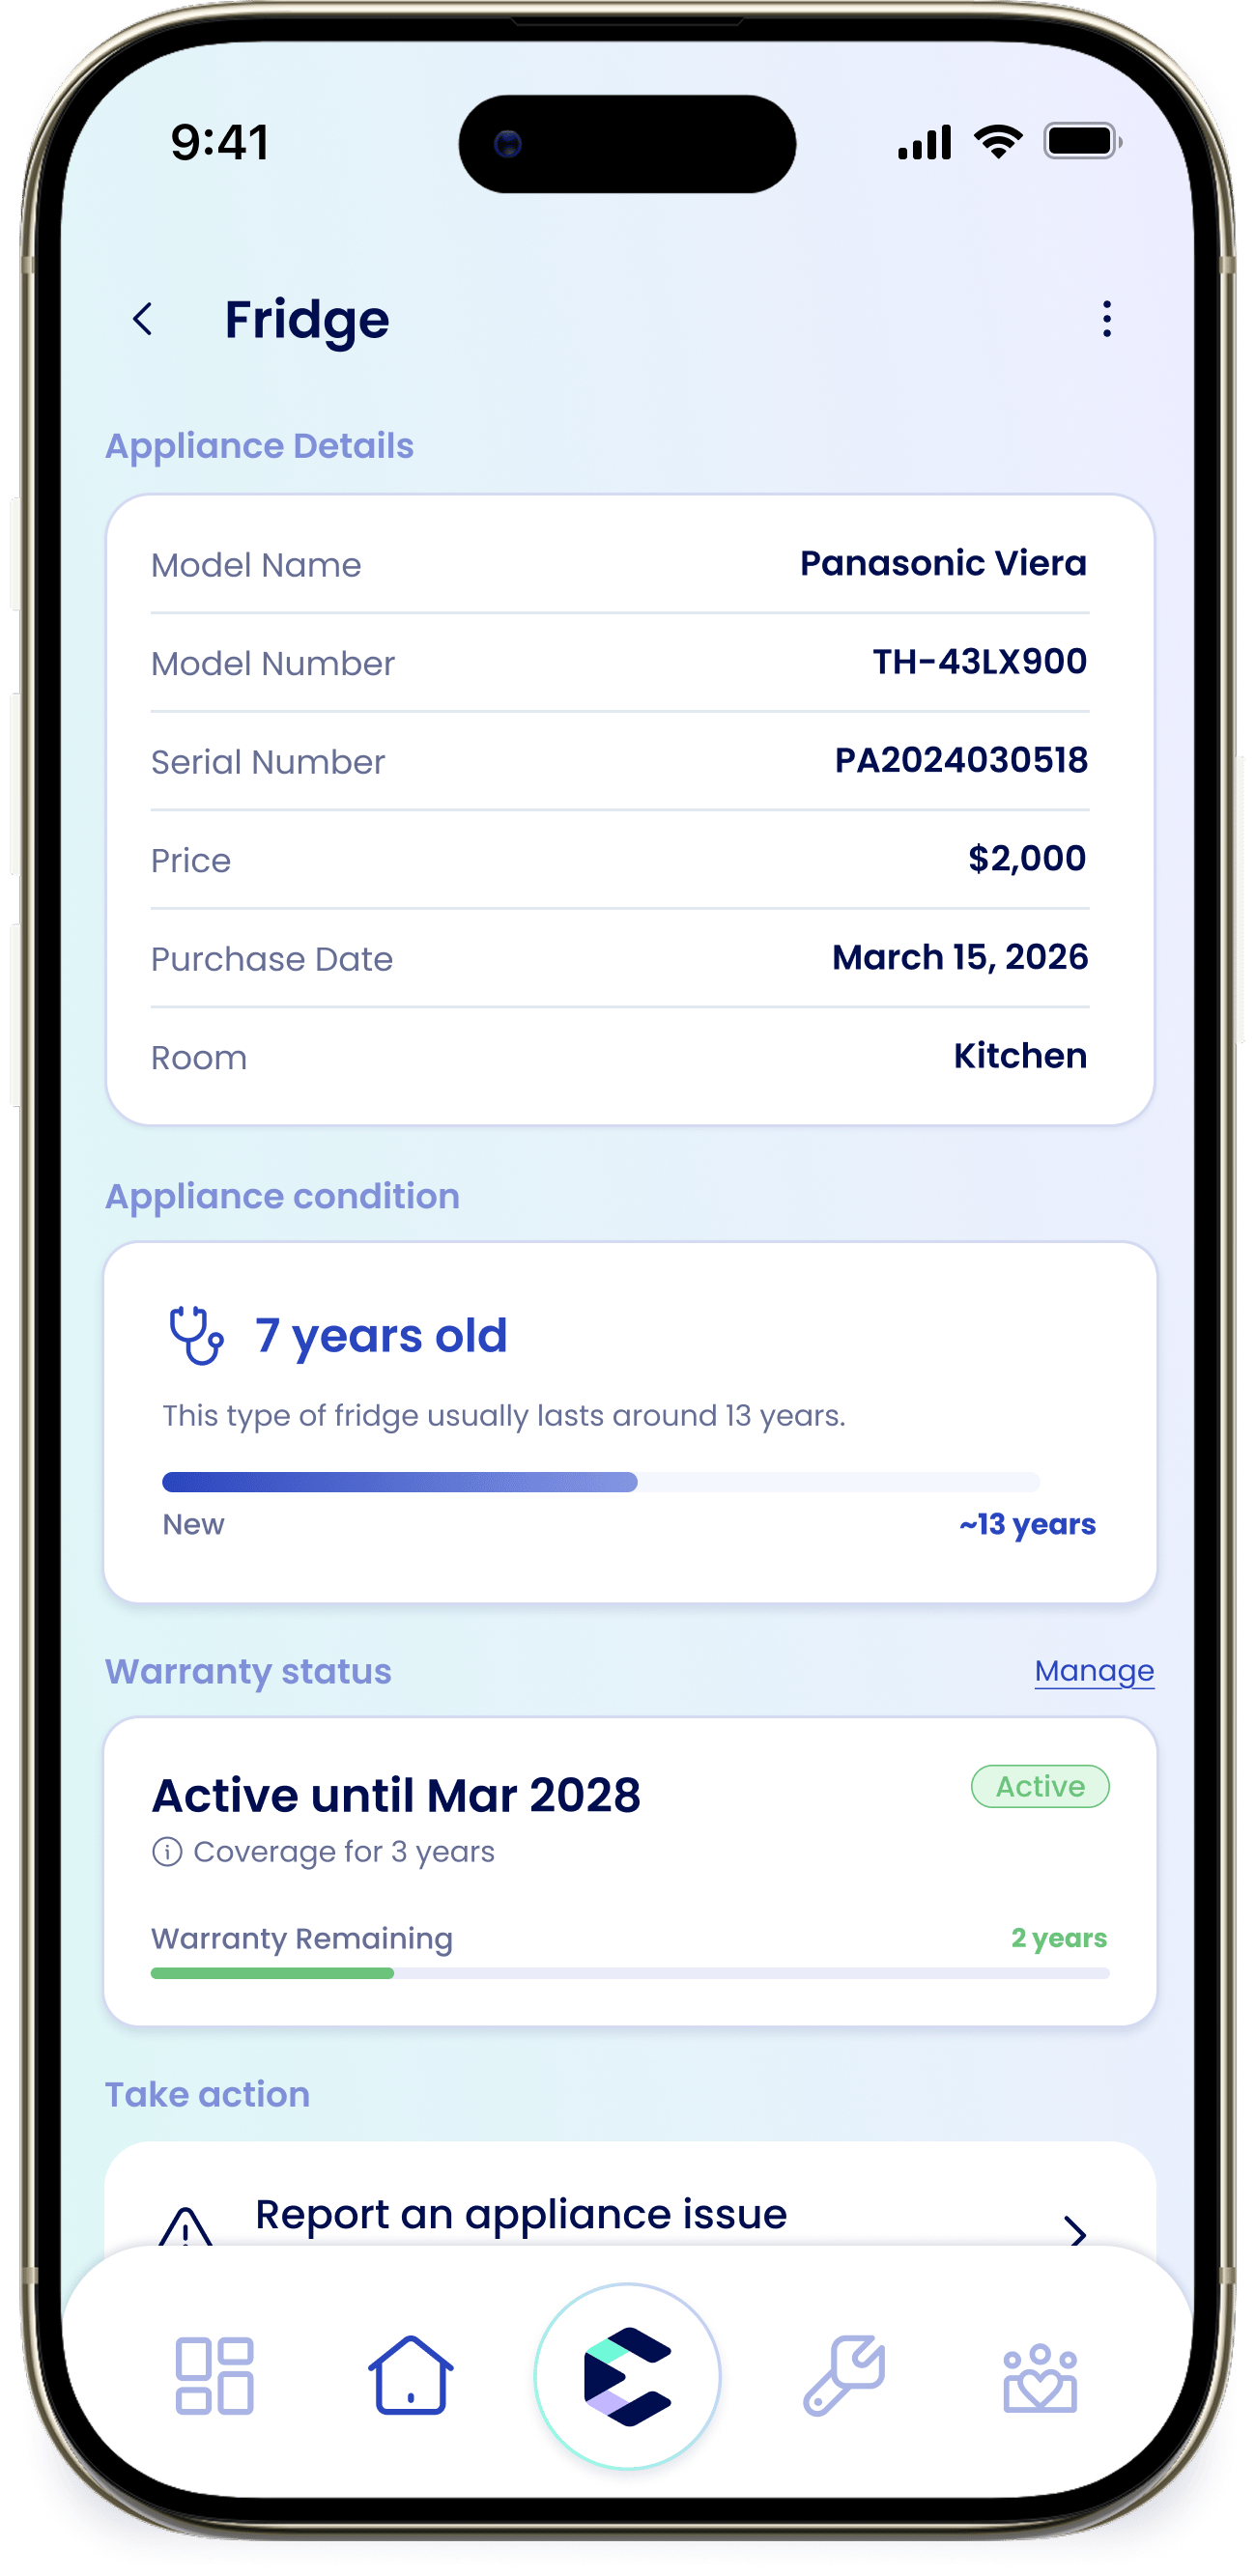
Brand, Model, Serial Number, Price, Purchase Date, and Room, all editable inline.
The auto-fetched manual, plus anything you upload with Add.
Register or view the warranty. You can add multiple warranties to an appliance.
"Report an appliance issue" to start a repair, "Log Maintenance", and "Add Receipt".
The people who've serviced it.
A running record of everything logged.
There's also an "Ask about this appliance" card if you want to ask eeva a question about it.
Tap +, choose "Enter manually", then tap "Continue".
Choose an appliance type — "Refrigerator", "Oven", "Dishwasher", "Washing Machine", "Dryer", or "Other" — then enter the "Brand" and "Model Number". Set a "Room" if you want.
Tap "Continue" to save. eeva uses the model number to fetch the manual, warranty, and recall data for you.
## What eeva auto-fetches
From the model number, eeva pulls in the product manual, maintenance schedule, the warranty window, and starts safety recall monitoring so your appliance is ready to get tracked.
## The appliance screen
Open any appliance to see everything eeva keeps for it:
Brand, Model, Serial Number, Price, Purchase Date, and Room, all editable inline.
The auto-fetched manual, plus anything you upload with Add.
Register or view the warranty. You can add multiple warranties to an appliance.
"Report an appliance issue" to start a repair, "Log Maintenance", and "Add Receipt".
The people who've serviced it.
A running record of everything logged.
There's also an "Ask about this appliance" card if you want to ask eeva a question about it.
 ## Change, archive, or delete
The ⋮ menu opens "Appliance actions": "Switch appliance type", "Move to another room", "Archive appliance", and "Delete appliance".
### Archive vs. delete
Archiving is reversible. eeva asks "Archive this appliance?" and explains: the appliance's history is saved, but warranty, recall, and tracking will stop. You can restore it anytime, and archived appliances show under the "Archived" filter.
Deleting is permanent. eeva asks "Delete this appliance?" — this removes it and all of its history: the maintenance log, receipts and uploaded documents, warranty registration, and service-provider history.
If you might want an appliance back, archive instead of delete. Deleting removes its full history and can't be undone.
## eeva doesn't have my manual yet
If eeva doesn't have the manual for your appliance yet, it flags it as being sourced, goes and finds it, and sends you a "Manual found" notification when it's ready. In the meantime, you don't have to wait — you can upload your own manual (PDF) from the appliance's "Documents" section.
## Related
This documentation is built and hosted on [Mintlify](https://mintlify.com), a developer documentation platform.
## Change, archive, or delete
The ⋮ menu opens "Appliance actions": "Switch appliance type", "Move to another room", "Archive appliance", and "Delete appliance".
### Archive vs. delete
Archiving is reversible. eeva asks "Archive this appliance?" and explains: the appliance's history is saved, but warranty, recall, and tracking will stop. You can restore it anytime, and archived appliances show under the "Archived" filter.
Deleting is permanent. eeva asks "Delete this appliance?" — this removes it and all of its history: the maintenance log, receipts and uploaded documents, warranty registration, and service-provider history.
If you might want an appliance back, archive instead of delete. Deleting removes its full history and can't be undone.
## eeva doesn't have my manual yet
If eeva doesn't have the manual for your appliance yet, it flags it as being sourced, goes and finds it, and sends you a "Manual found" notification when it's ready. In the meantime, you don't have to wait — you can upload your own manual (PDF) from the appliance's "Documents" section.
## Related
This documentation is built and hosted on [Mintlify](https://mintlify.com), a developer documentation platform.