Open your appliances
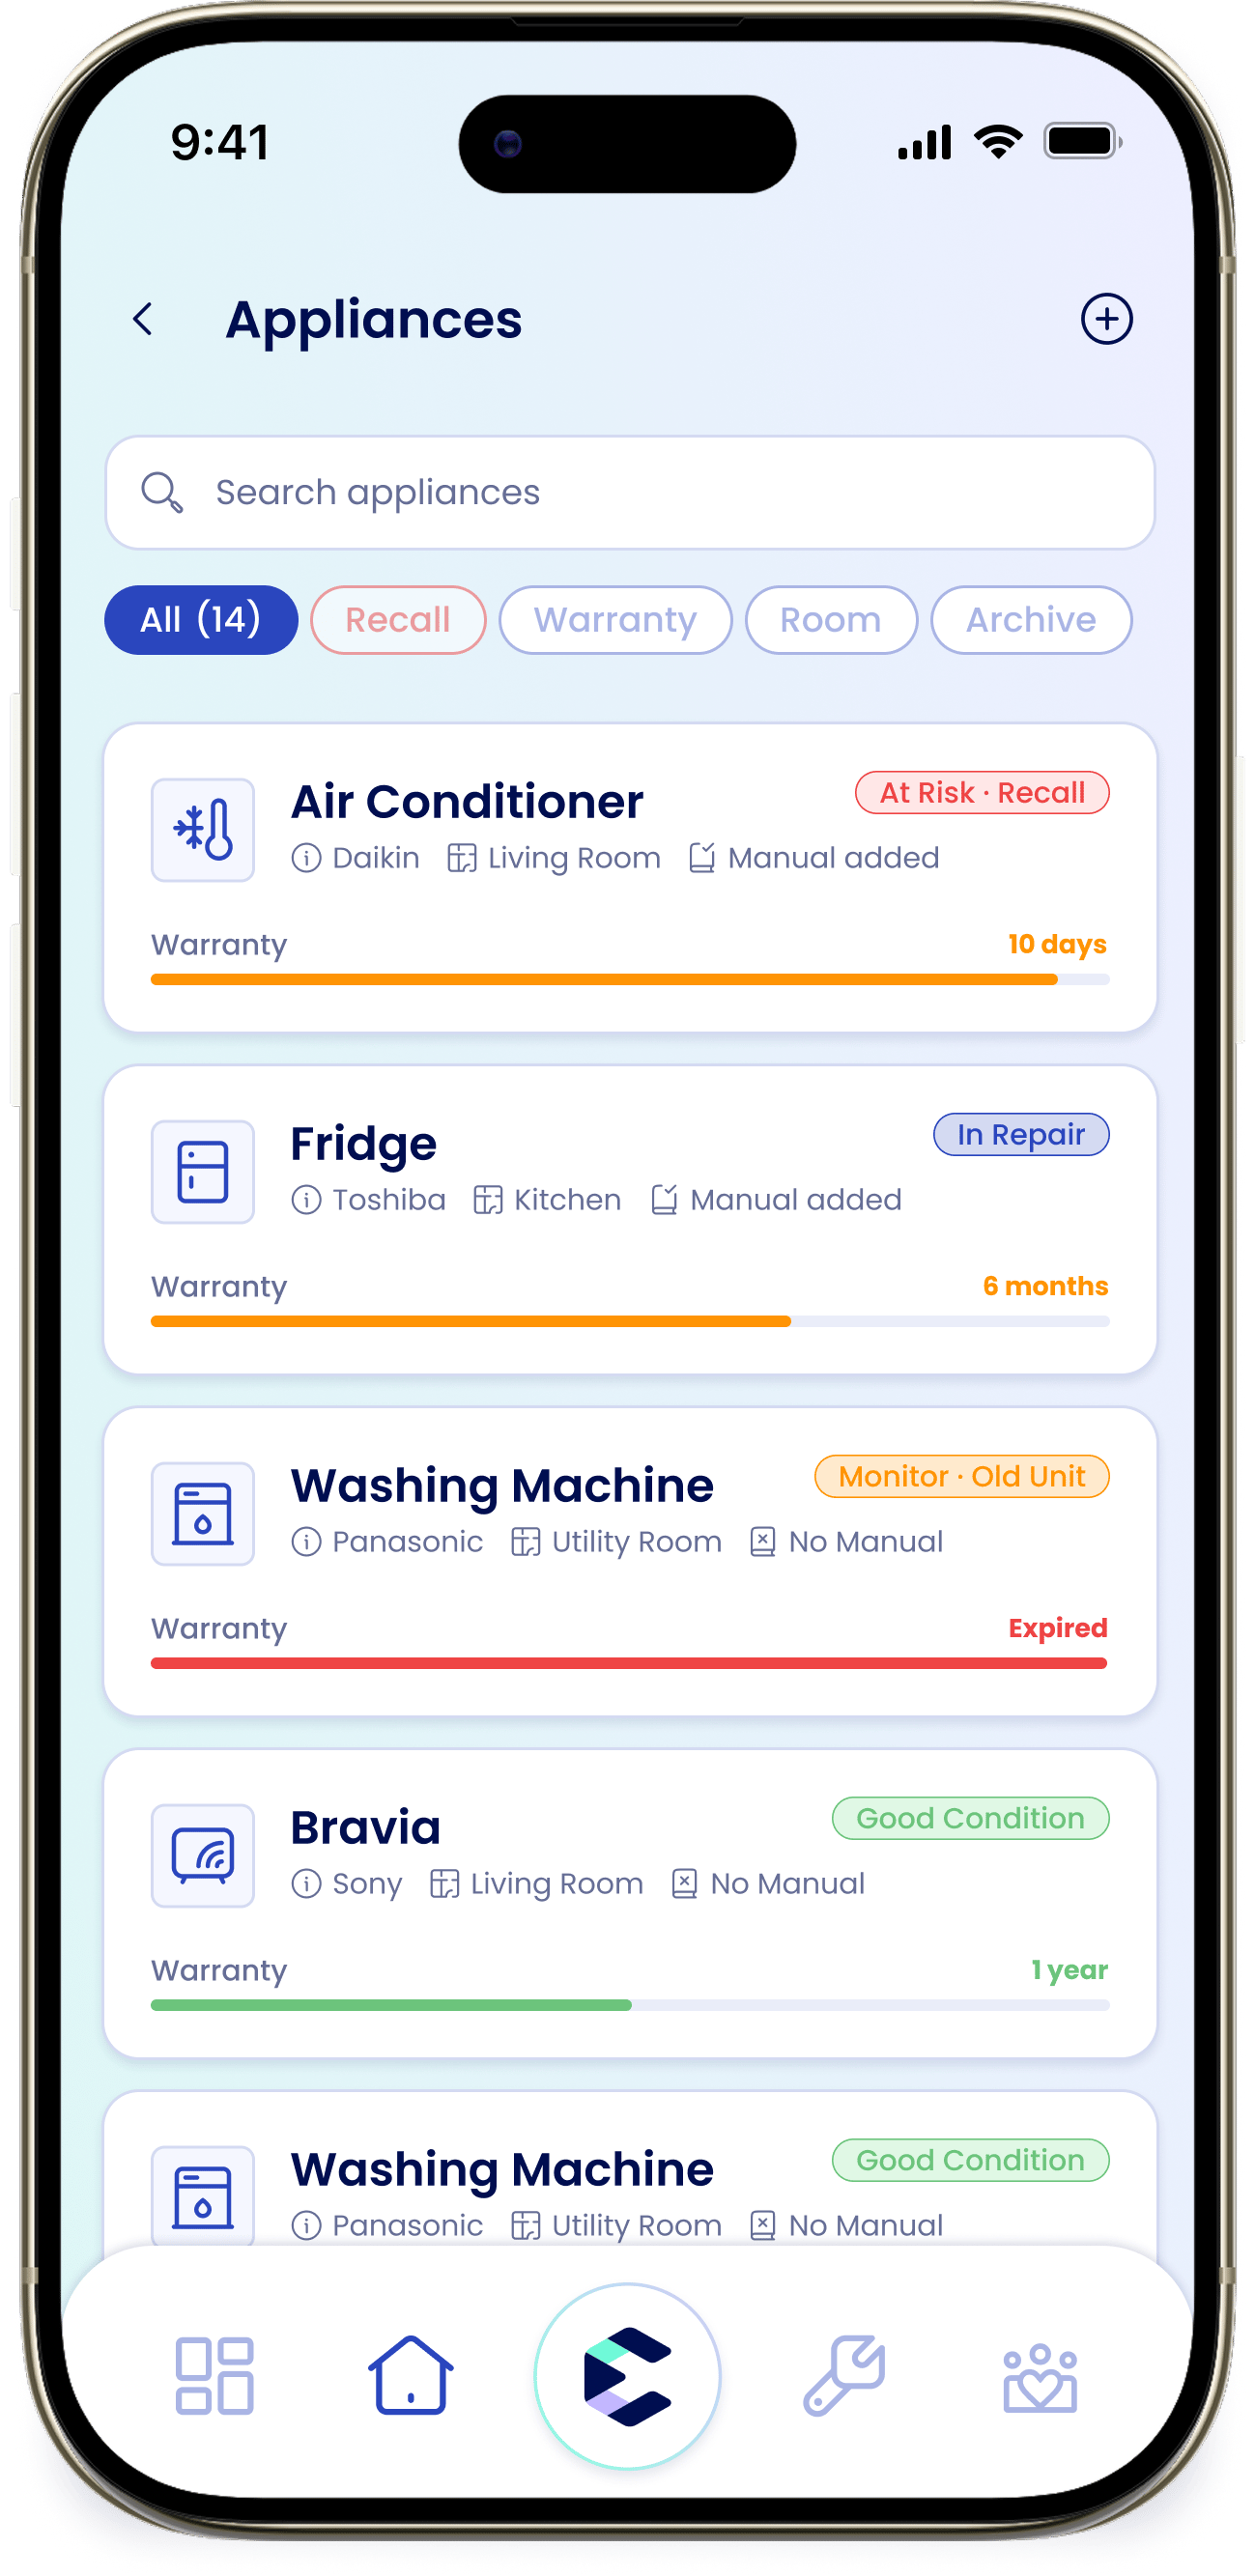
From the Home tab, tap the “Appliances” card. At the top there’s search field, “Search appliances”, and filter to choose from: “All (N)”, “Recall”, “Warranty”, “Room”, and “Archived”. Tap the + to add one. If you haven’t added anything yet, you’ll see “No appliances yet!” with “Scan label” and “Add manually”.Add an appliance
The fastest way is to scan the model label so eeva can automatically fill in the details. You can also type the details in by hand.- Scan the label
- Enter manually
1
Start a scan
Tap +, then choose “Scan the label (recommended)” and tap “Continue”.
2
Point at the label
On the “Scan the appliance label” screen, tap “Tap to scan” and aim your camera at the label — usually a sticker on the back, top, or inside the appliance. Hold steady.
3
Review what eeva found
On a good read you’ll see “Does this look right?” with editable “Appliance type”, “Brand”, “Model Number”, and “Serial Number” fields. Pick a “Room” if you like. If it’s wrong, tap “Not the right appliance? Scan again”.
4
Add it
Tap “Add to eeva” to save the appliance to your home.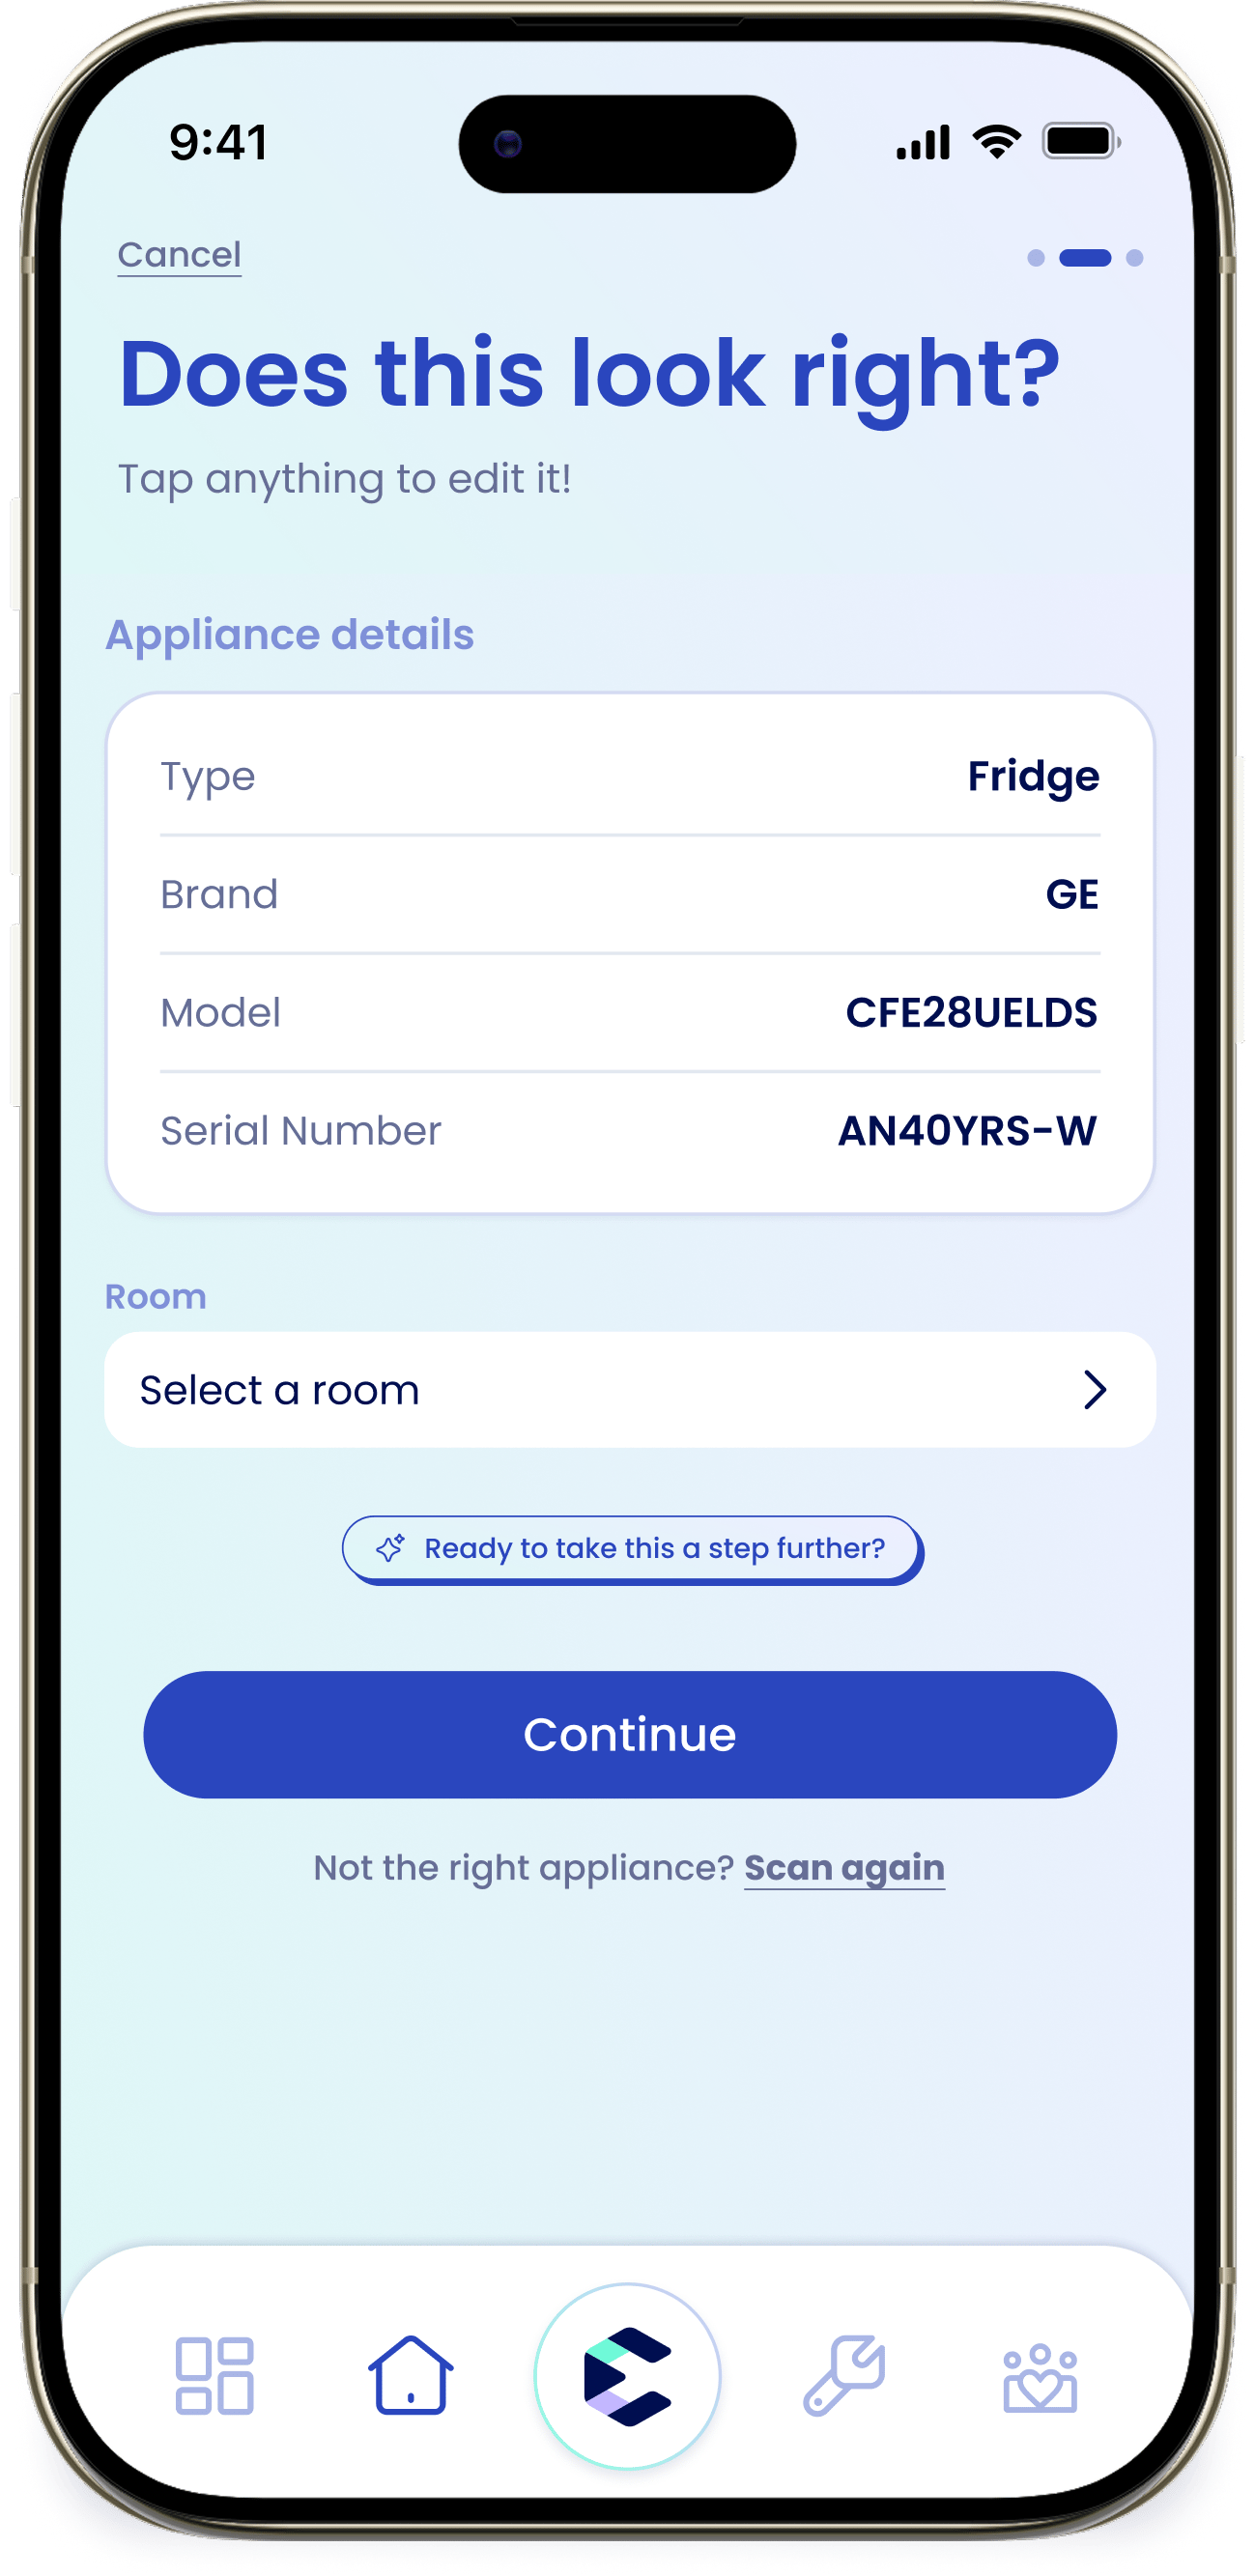
What eeva auto-fetches
From the model number, eeva pulls in the product manual, maintenance schedule, the warranty window, and starts safety recall monitoring so your appliance is ready to get tracked.The appliance screen
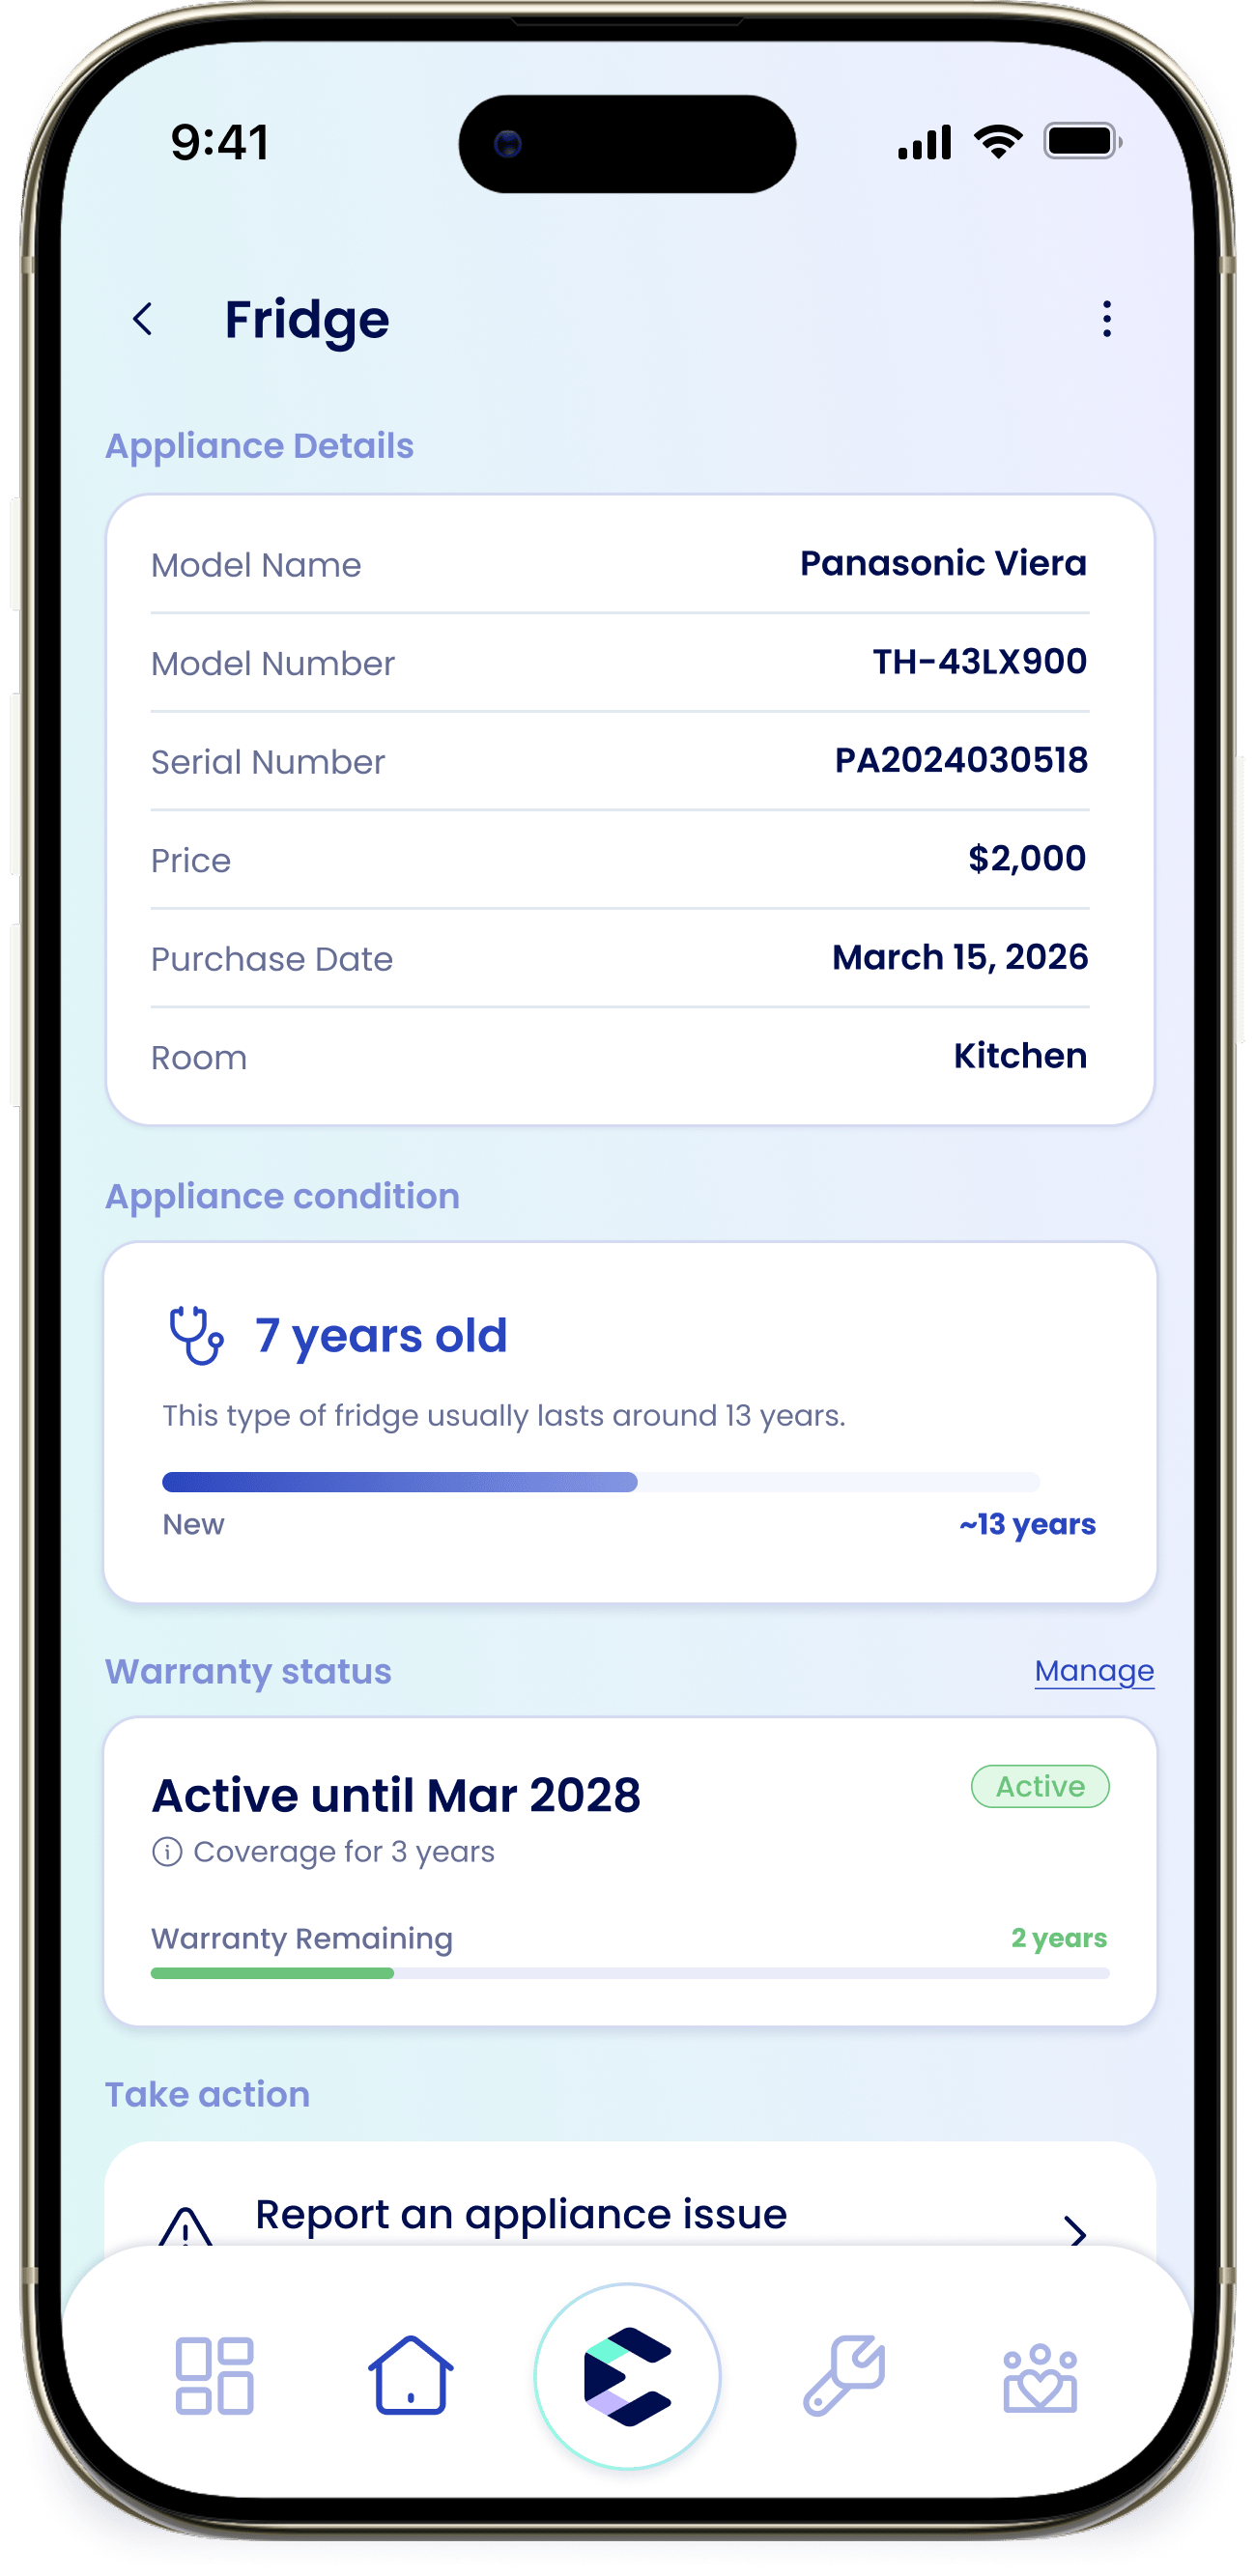
Open any appliance to see everything eeva keeps for it:Appliance details
Brand, Model, Serial Number, Price, Purchase Date, and Room, all editable inline.
Documents
The auto-fetched manual, plus anything you upload with Add.
Warranty status
Register or view the warranty. You can add multiple warranties to an appliance.
Take action
“Report an appliance issue” to start a repair, “Log Maintenance”, and “Add Receipt”.
Providers
The people who’ve serviced it.
Maintenance History
A running record of everything logged.