

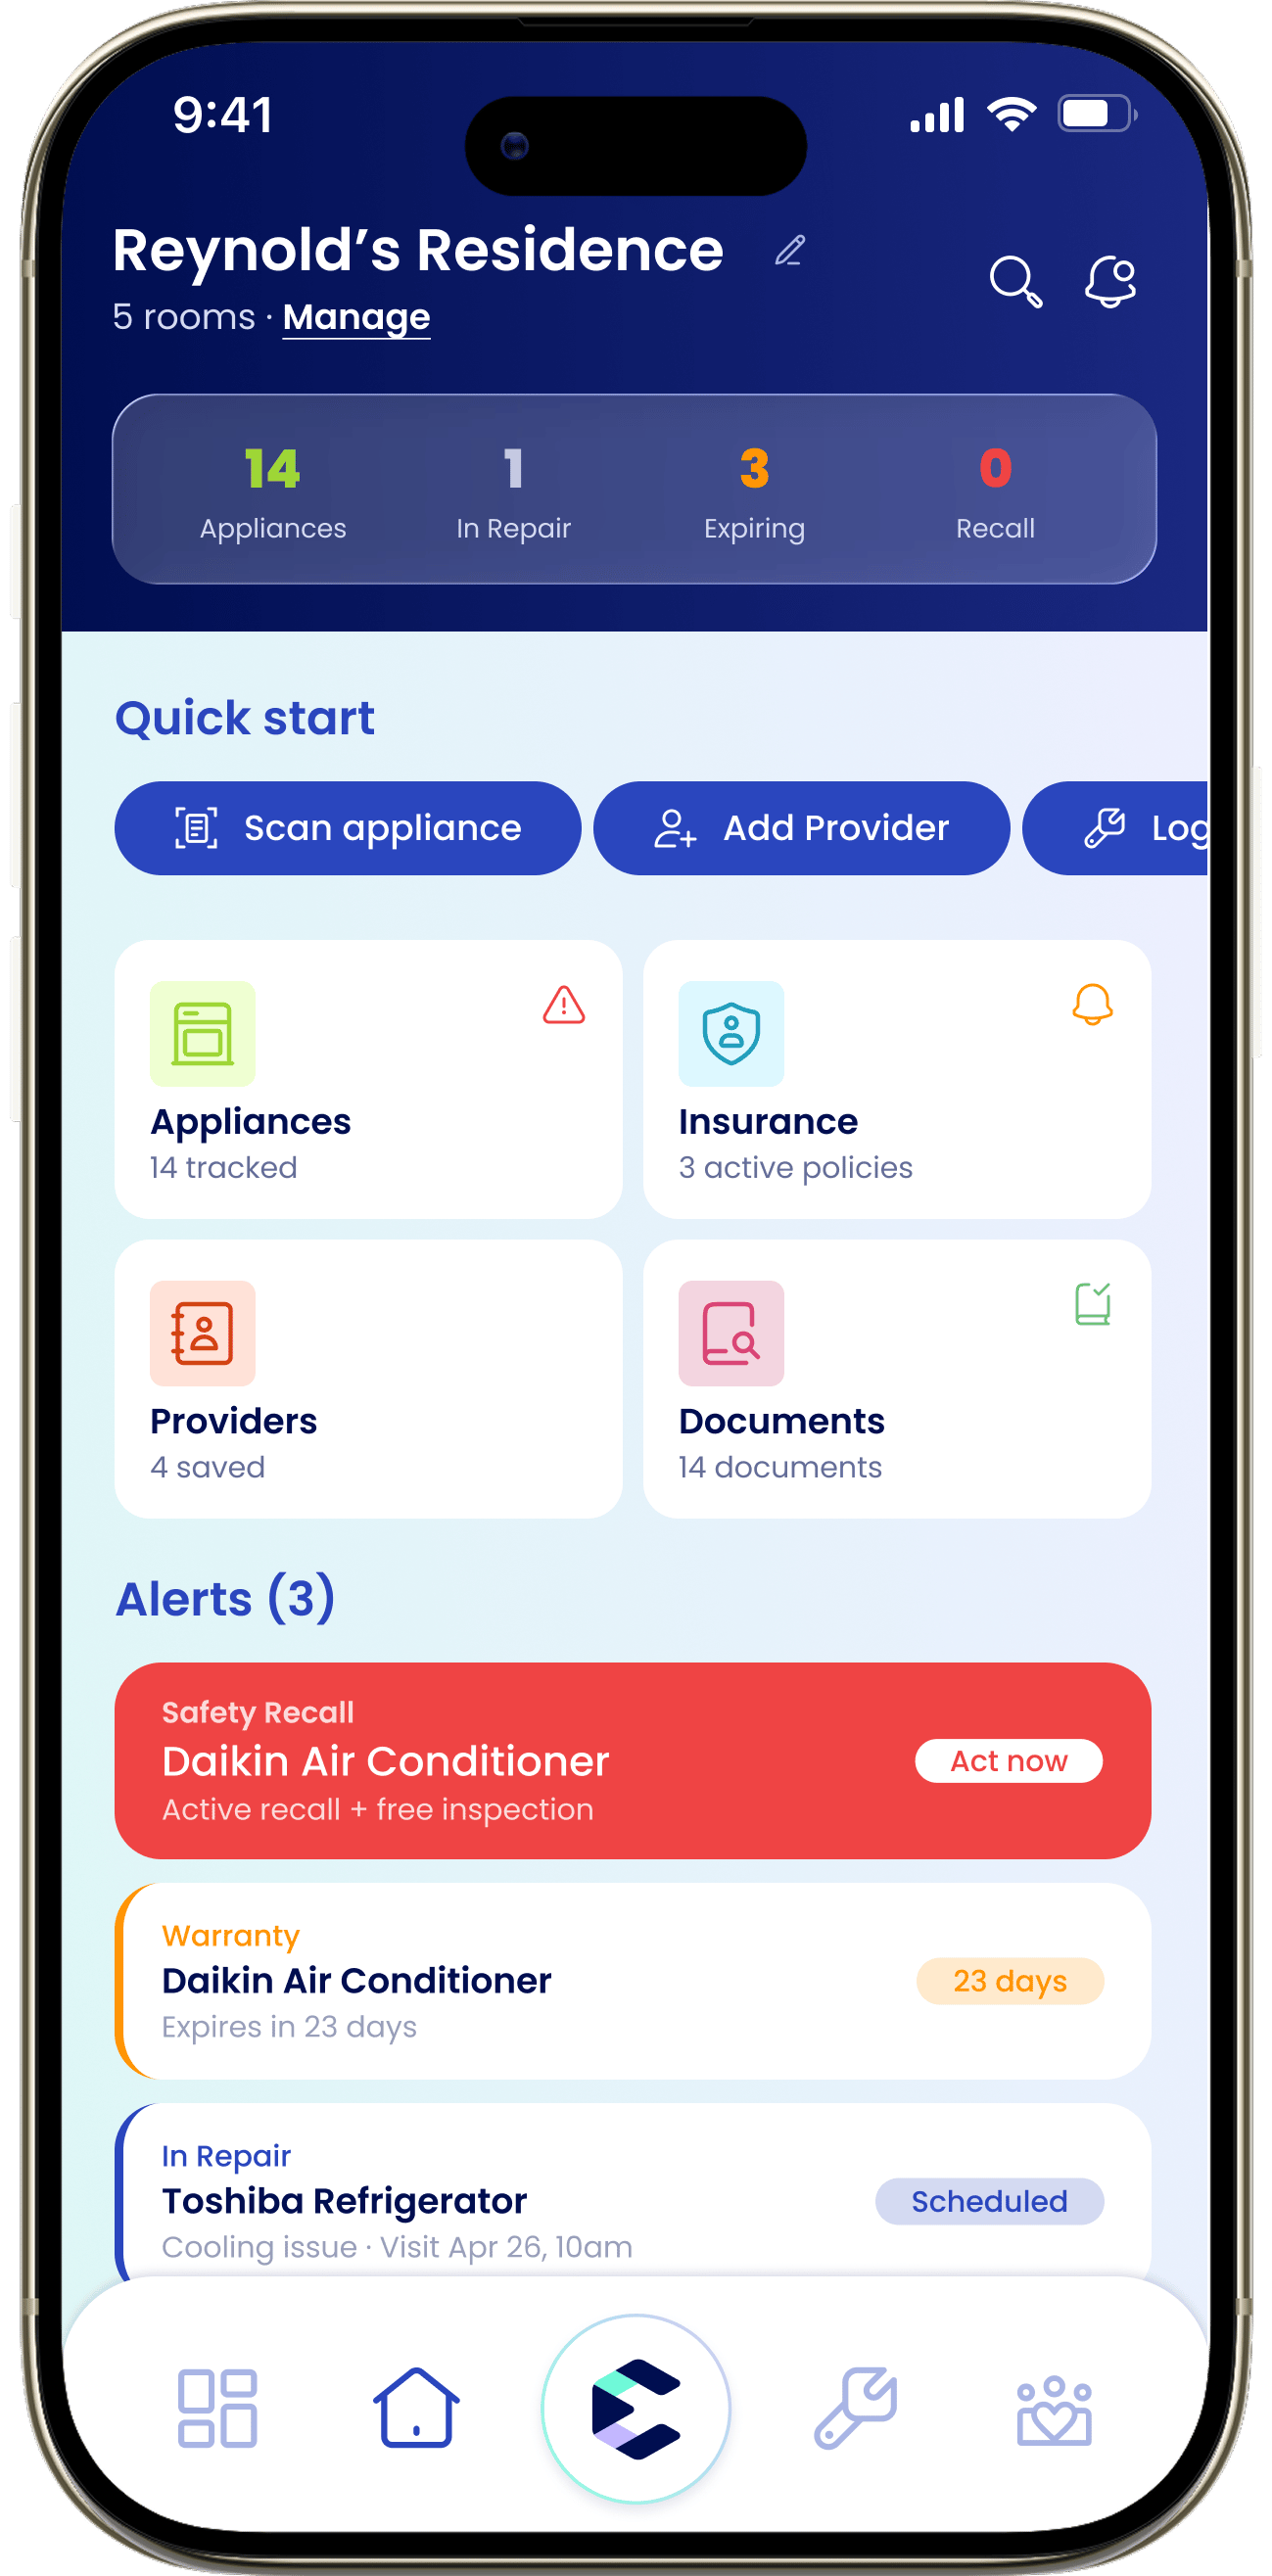
The header
At the top you’ll see your home’s name — it’s editable, and starts as “Your home”. Tap it to rename it to something like “The Miller House.” Just below is a rooms line showing how many rooms you have (“1 room” or “2 rooms”) with “Manage” to edit them or “Add one” if you don’t have any yet. A search icon and a notifications bell sit in the corner.The stats bar
A row of tappable tiles gives you a quick read on your appliances: “Appliances”, “In Repair”, “Expiring”, and “Recall”. Tap any tile to open your appliance list already filtered to that group — for example, tap “Expiring” to see only appliances with a warranty running out soon.Quick actions
Once you’ve added an appliance, a “Quick start” row gives you one-tap shortcuts — “Scan appliance”, “Add Provider”, and “Log entry” — and a quick-actions grid links to the four areas below. Before you have any appliances, the House tab shows a “Let’s set up your home!” card with “Add first appliance” instead.The four areas
Appliances
Track manuals, warranties, recalls, and repairs for everything in your home.
Insurance
Keep home, life, car, and other policies handy when you need them.
Documents
Manuals, receipts, warranty cards, and policies, all stored and searchable.
Providers
The people and companies who service your home, with one-tap contact.
Logging maintenance and scheduling repairs happen from the Maintenance tab, not House. See Maintenance for the full guide.
Rooms
Rooms let you group appliances by where they live, so your home stays organized as it grows.1
Access rooms at the top of the House tab
From the rooms line in the header, tap “Manage” (or “Add one” if you have no rooms yet).
2
Add or create a room
Add a room like “Kitchen” or “Garage,” or create a custom one.
3
Assign appliances to rooms
You’ll be able to save appliances to a “Room” when you add or edit it.